ZION NATIONAL PARK’S BEST HIKES!
Zion National Park has a wide range of hiking opportunities ranging from short family-friendly hikes to longer strenuous day hikes and 2 to 3-day backpacking trips. If you are a first-time visitor and want to see the best of Zion in a few days, try to squeeze in all of the best “short-and-easy hikes” below. Fit hikers who are prepared for more strenuous adventures should look into two of Zion’s most famous hikes: Angels Landing and the Zion Narrows. Beyond that, there are still many, many more opportunities to explore! Bring the National Geographic Trails Illustrated Map with you to find your way through the different sections of Zion National Park.
Hiking Symbols used for descriptions:
![]() ZION CLASSIC: a must-do hike if you want to see the best of Zion!
ZION CLASSIC: a must-do hike if you want to see the best of Zion!
![]() FAMILY-FRIENDLY: a good choice for those with children who like to hike.
FAMILY-FRIENDLY: a good choice for those with children who like to hike.
![]() BACKPACKING: a route enjoyable as a multi-day hike.
BACKPACKING: a route enjoyable as a multi-day hike.
Trail Head(s) closest to the TakeOnAdventure village:
OBSERVATION POINT – Upper
![]() Rating: fairly moderate day hike.
Rating: fairly moderate day hike.
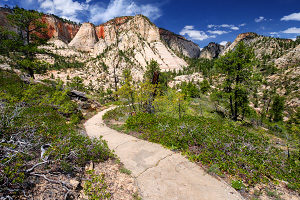
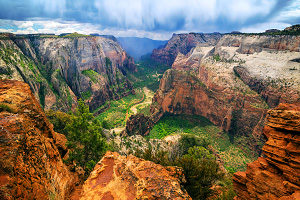
The UPPER Observation Point trail head is located about 10 minutes via car from our property and is easily found by following the direction signs as you proceed north on Beaver Road. The Take On Adventure Village is located at the highest point on the east rim of Zion. This provides a relatively level hike to Observation Point as opposed to scaling the 2000+ foot elevation gain trail from the bottom of Zion Canyon near Weeping rock. Plan on 4 to 6 hours round trip. For more information on accessing Observation Point from the Zion Canyon floor which includes the scenic views within Echo Canyon (see the write-up on the traditional Observation Point trail below). Some of our guests have started their hike near the Village and then continued down into the Weeping Rock area before catching the shuttle and taking pre-arranged transportation back to the Village from the Visitors Center near the south entrance.
CABLE MOUNTAIN – Upper
![]() Rating: fairly moderate long day hike.
Rating: fairly moderate long day hike.
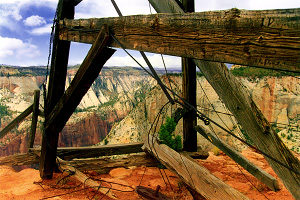
The UPPER Cable Mountain trail head (a.k.a. Stave Springs) is less than 5 minutes from the property and is easily found by proceeding South (right turn from property) on South Oak Rd and hanging a right (West) on Pine St. This hike starts in a charming ponderosa forest and follows an access trail that leads into the park to intersect with the East Rim Trail. Round-trip distance: 7.5 miles. The cable works were originally constructed by David Flanigan in 1901 to transport timber from the plateau to the main canyon below. The operation was shut down by 1930 but, the ruins remain. The view from the Cable Mountain viewpoint is sublime.
The Best Short-and-Easy Hikes:
EMERALD POOLS TRAIL
![]()
![]() Rating: easy family stroll.
Rating: easy family stroll.
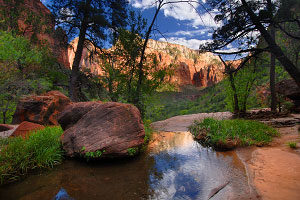
Emerald Pools is a Zion classic: an oasis in the middle of the desert. The hike is a collection of short trails that meander past a small, lushly-vegetated stream that rolls down from the cliffs and forms several interesting “pools.” If you have only two hours to spend on a leisurely non-strenuous hike with the entire family, I would probably pick this one. As this hike is not very difficult and it is located just across from the Zion Lodge, this trail gets crowded in the summer months. Be prepared to share the views with many other people.
WEEPING ROCK
![]()
![]() Rating: very easy quick family stroll.
Rating: very easy quick family stroll.
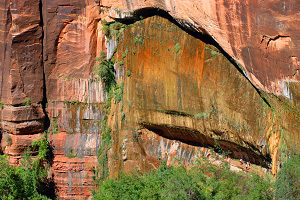
Weeping Rock is a famous landmark of Zion National Park and is an easily accessible tourist attraction. Weeping Rock is a large bowl-shaped alcove where the lower layer of sandstone has eroded away; water that has been slowly descending within the sandstone formations reaches an impermeable layer of rock and is forced out the side causing the “weeping.” The weeping walls form a beautifully lush hanging garden with a little flowing stream below. A short 10-minute stroll takes you under the beautiful alcove with wonderful water sprinkling from above.
RIVERSIDE WALK
![]()
![]() Rating: easy family stroll (wheelchair accessible).
Rating: easy family stroll (wheelchair accessible).
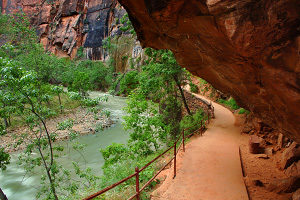
The Riverside Walk is a wonderful little hike on a fairly level paved trail that affords great views of the Virgin River and wonderfully lush hanging gardens and trees surrounded by tall weeping walls. This hike is very family friendly: young children and the elderly alike can do this trail, and the trail is also wheelchair accessible. This mostly level hike is roughly two-miles long (round trip) and may take one to two hours to complete (or more if you want to take your time and soak in the views).
THE WATCHMAN TRAIL
![]() Rating: easy to moderately strenuous day hike.
Rating: easy to moderately strenuous day hike.
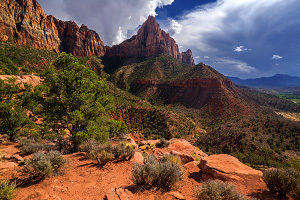
The Watchman is a short trail that starts by the Visitor Center and leads to a viewpoint roughly 300 feet above. The view isn’t as stunning as from other hikes like Angels Landing or Observation Point, but it takes a lot less effort to get up here as well. This is a pleasant little hike suitable for the entire family, but keep a close eye on children as the trail skirts several exposed areas. During the afternoon heat of summer, this hike could be torture, so early morning is the best time for this one.
CANYON OVERLOOK TRAIL
![]()
![]() Rating: easy short hike with some exposure.
Rating: easy short hike with some exposure.
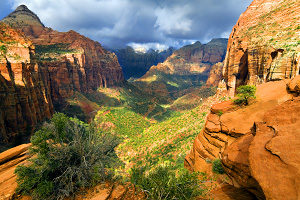
If you have a vehicle, drive east on Route 9 to go through the famous Zion-Mt. Carmel Tunnel and enjoy the ride through the wonderous slickrock of the Upper East Canyon. The Canyon Overlook Trail is one of the few official trails in the upper East Canyon; starting just east of the tunnel, it is a nice short-but-sweet hike that ends at a great viewpoint looking into the main canyon. If this is your first trip to Zion, this one is a must-do hike! Caution: while this hike is not very strenuous, there are a few exposed spots where a fall could be dangerous.
NORTHGATE PEAKS TRAIL
![]() Rating: short easy family hike.
Rating: short easy family hike.
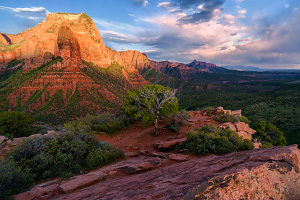
For something a bit more remote that takes you out of the popular main canyon, try the Northgate Peaks Trail in the Kolob Terrace section. At 4 miles total, this hike is a bit longer than the other hikes on this “easy” list, but the trail is mostly level will reward you with some great views. And it’s also a great excuse to drive up the Kolob Terrace Road and see some remote scenery that most people miss. The view at the end of the trail is more “subtle” than views from the West Rim Trail or the main canyon, but it gives you a fascinating peek into the Great West Canyon.
TIMBER CREEK OVERLOOK TRAIL
![]() Rating: quick easy stroll.
Rating: quick easy stroll.
If you’re looking to escape the crowds of the main canyon and see something different, the Kolob Canyons Road is a wonderfully scenic drive that gives wonderful views into several of the Kolob “finger canyons.” The road ends high up on a ridge at a great viewpoint known as the “Kolob Canyons Viewpoint.” The Timber Creek Overlook Trail is a short stroll that heads south from the main parking lot to offer more pleasant views from the top of the ridgeline. Sunset is a wonderful time to do this hike.
ANGELS LANDING
![]() Rating: fairly strenuous and exposed day hike.
Rating: fairly strenuous and exposed day hike.
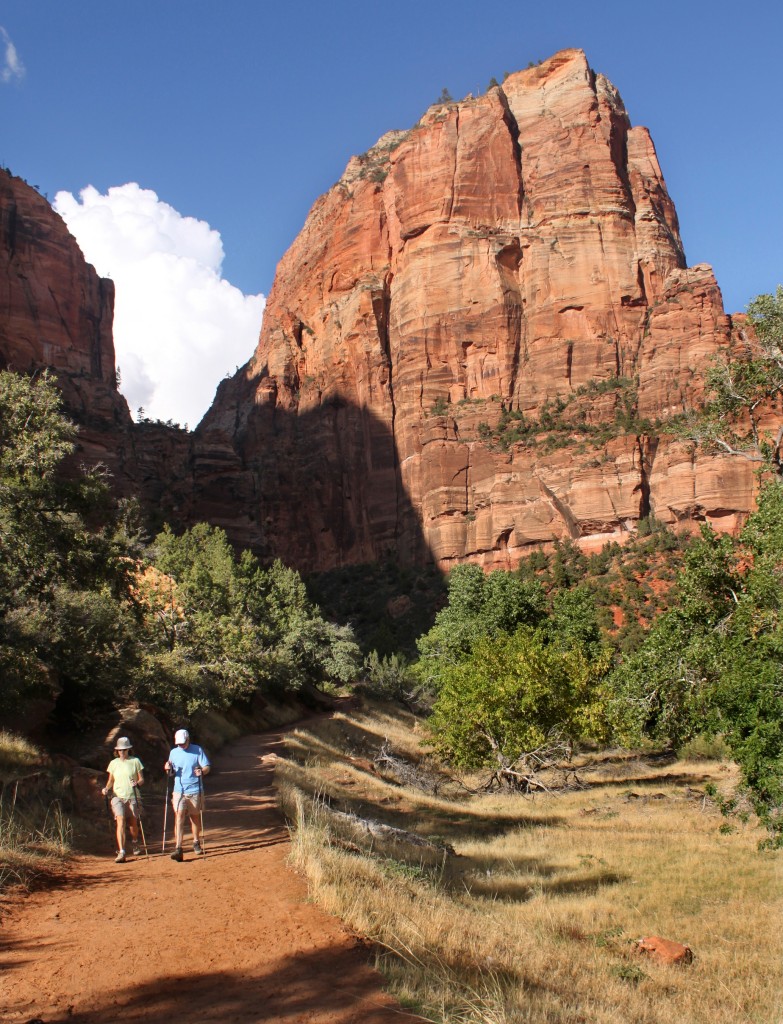
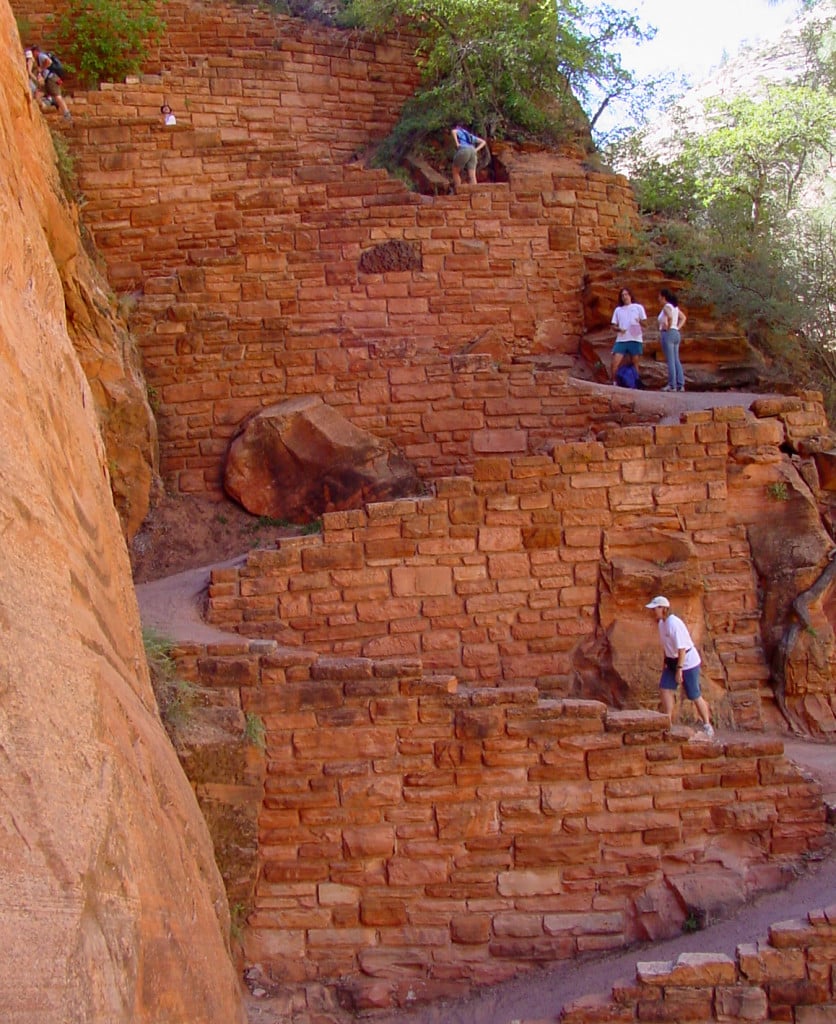
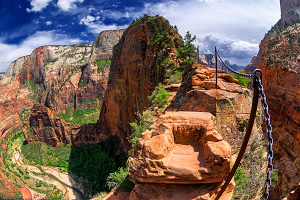
Angels Landing is one of the defacto classic hikes in Zion and one of the most stunning viewpoints you will ever experience, but it’s not recommended for anybody with a fear of heights. Starting at the Grotto trailhead, the hike to Angels Landing follows the West Rim Trail up and out of the west side of the main canyon. Angels Landing is unique fin-like mountain formation that juts out to the center of the main canyon. The trail follows the narrow spine to the final viewpoint roughly 1500 feet above the canyon floor. Along the way, chains, handrails, and steps reassure hikers at the more exposed sections.
Sure, you’ve heard of Angels Landing: the 1,488 foot tall rock formation in the heart of Zion National Park. But do you know what it’s like to actually climb it?
Angels Landing is the most famous hike in Zion and features everything from strenuous switchbacks to breathtaking dropoffs. The summit offers a stunning 360 degree view of the park and according to its discoverer Frederick Fisher, “only an angel could land on it.” This guide will tell you everything you need to know to conquer the monolith safely and successfully.
When to visit
The trail is open year-round, but peak season is from March to October. If you’re brave enough to trek in the winter months, be aware of ice and snow on the trail that could make hiking unsafe. The winter, early spring, and late autumn will guarantee smaller crowds, but the summer promises sunshine and warmth.
As far as the best time of day goes, it again depends on the season. In the summer, it may be better to hike in the morning before the heat of the day sets in. The trip takes about five hours total, so make sure you have enough time to finish before dark if you come in the late afternoon or evening.
What to bring
Some essential supplies for hiking Angels Landing:
Sunscreen: No matter the season, sunscreen is a must. Most of the hike is void of shade and you can even get burned when it’s cloudy.
Lots of water: Angels Landing takes on average five hours round trip, and it is a strenuous hike, so make sure you stay hydrated.
Hiking shoes: Take care to wear shoes with good traction and support. Parts of the trail can be treacherous and slippery, even in fair weather.
Snacks and a lunch: Refuel yourself along the way. Take a break to eat lunch at the top and enjoy the view.
Layered clothing: If you’re hiking in the cooler winter months, you’ll want to dress warm, but make sure you layer so you can shed as the hike becomes more physically demanding.
Other items could include a camera, a map of the park, sunglasses, and of course a backpack to hold all your materials.
Where to go
The Angels Landing trail begins at the area known as the Grotto. If you’re riding the shuttle, get off at the Grotto shuttle stop. If you’re driving yourself into the park during the shuttle’s offseason, drive into the canyon and park when you reach the Grotto picnic area. From there, cross the road and the footbridge that spans the Virgin River and head up the West Rim trail. You’re on your way to Angels Landing!
What to expect
The trail leading to Angels Landing itself has five main sections, each offering their own unique experience and challenge.
You will begin your journey on the West Rim trail. A paved, well-maintained walkway begins to wind you among the trees and then up the side of the mountain in a series of long switchbacks. The higher you climb, the more you can see of the basin below, featuring the glittering Virgin River and a blend of multicolored stone.
After about a mile, the trail turns into a shady canyon to give you a break from the steep switchbacks. Greener vegetation grows beside the path, no longer dried up by the beating sun like the trees you just passed through. Carved out between Angels Landing and Cathedral Mountain, a breeze often blows through this passageway, giving it the name Refrigerator Canyon.
A sharp turn toward the end of the canyon takes you up another series of even steeper and more strenuous switchbacks known as Walter’s Wiggles. Each corner offers you a view down into Refrigerator Canyon and a chance to catch your breath.
When you reach the top of the Wiggles, you’ll be at Scout’s Lookout, a wide space featuring remarkable views of Zion Canyon. At this juncture, the West Rim trail continues through Cabin Spring and on to Lava Point, but the Angels Landing trail turns to lead up to the summit. Scout’s Lookout is the end of the road for many less experienced or less adventurous hikers and a good place to stop and snack.
The final stretch of the expedition is the Angels Landing trail itself. From Scout’s Lookout, it’s about half a mile to the summit, but it’s not an easy walk. The trail becomes narrow and rocky, and most parts have sheer cliffs on one or both sides. Hang on to the chains bolted into the rock for your security. Watch your step, be courteous of other hikers, and take it slow, and you’ll make it to the summit.
Once you’re at the top, take the time to relax for a few minutes and enjoy the awe-inspiring scenery and panoramic view of Zion Canyon. The summit is wide and flat, giving you the freedom to sit down and eat or walk around and take pictures before beginning your long descent. You did it!
ZION NARROWS DAY HIKE
![]() Rating: moderately strenuous/strenuous river hiking.
Rating: moderately strenuous/strenuous river hiking.
For tourists or casual hikers who want to see the best of the Zion Narrows, this is the route to do. Starting at the Temple of Sinawava, you can hike up the Riverside Walk trail and then continue hiking right up the river to see some of the best “narrows” sections of the North Fork of the Virgin River. Hike up as far as you want to go and then turn around and retrace your steps. A side hike up Orderville Canyon is also a good detour to see even more amazing slot canyon scenery.
OBSERVATION POINT TRAIL
![]() Rating: fairly strenuous day hike.
Rating: fairly strenuous day hike.
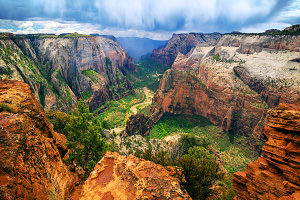
Must be accessed from Top Down … Trail up from Weeping Rock is closed due to landslides. The hike from the Weeping Rock Trailhead to Observation Point is a Zion classic and the viewpoint at the end of the trail is an iconic image of Zion National Park. The Observation Point Trail is a strenuous 8-mile (round trip) hike that could take between 4 to 6 hours and involves a lot of unrelenting uphill on a hard paved trail that was blasted out of the canyon walls. Along the way, hikers get a glimpse into the dark and mysterious Echo Canyon with its beautiful slickrock formations and stunning White Cliffs.
HIDDEN CANYON
![]() Rating: fairly strenuous day hike.
Rating: fairly strenuous day hike.
Hidden Canyon (currently closed because of landslide(s) gives hikers a taste of canyoneering without requiring any climbing or rappelling to complete the hike. Starting at the Weeping Rock trailhead, hike up the same trail to Observation Point, but take the side trail to Hidden Canyon instead. The somewhat exposed route will lead you to the mouth of Hidden Canyon — a beautifully narrow canyon “hidden” above the main canyon. The trail officially ends at the mouth of the canyon, but you can explore quite a ways back.
EAST RIM TRAIL
![]() Rating: fairly strenuous longer day hike.
Rating: fairly strenuous longer day hike.
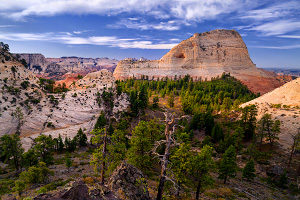
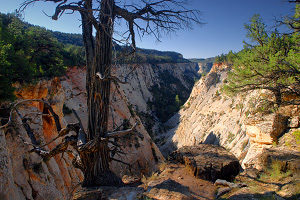
Most people are familiar with the lower section of the East Rim Trail that leads to Hidden Canyon and the Observation Point Trail, but few people hike the 11-mile long East Rim Trail in its entirety. Though usually compared unfavorably to its bigger brother (the West Rim Trail), a day hike along the East Rim Trail takes one through some wonderful scenery from the East Entrance through Echo Canyon down to Weeping Rock in the main canyon. ![]() Alternatively, much of this trail is easily accessible from the TakeOnAdventure Village property by driving to the UPPER Observation Point or the UPPER Cable Mountain Trailhead(s). In addition, the photo used for the East Rim above was taken about 20 minutes from the Village … Drive south on Lewis Lane to the end and then continue either via ATV (10 minutes) or walking (25 minutes) to the top of the blind canyon cliff that drops into Jolley Gulch. A seasonal stream which turns into a waterfall is a special treat during the Springtime.
Alternatively, much of this trail is easily accessible from the TakeOnAdventure Village property by driving to the UPPER Observation Point or the UPPER Cable Mountain Trailhead(s). In addition, the photo used for the East Rim above was taken about 20 minutes from the Village … Drive south on Lewis Lane to the end and then continue either via ATV (10 minutes) or walking (25 minutes) to the top of the blind canyon cliff that drops into Jolley Gulch. A seasonal stream which turns into a waterfall is a special treat during the Springtime.
TAYLOR CREEK TRAIL
![]()
![]() Rating: fairly easy day hike.
Rating: fairly easy day hike.
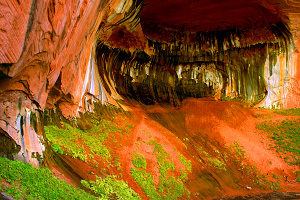
The Taylor Creek Trail (Middle Fork) is one of the few official and popular trails in the Kolob Canyons section: a pleasant 5-mile (roundtrip) hike up one of the enchanting “finger” canyons. The hike is fairly easy, but the trail is rough in spots and a little bit of stream-crossing is involved. Along the way are two historic old cabins from the early 1900’s. Eventually the canyon walls get get narrower until the route officially ends at one of the more famous Zion landmarks: the Double Arch Alcove.
THE SUBWAY FROM THE BOTTOM
 Rating: strenuous day hike.
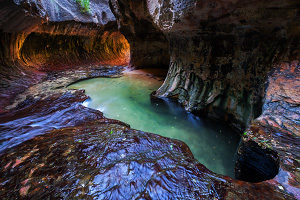
A long strenuous day hike (Non-Technical Hike) up one of the most popular canyons in Zion, the “bottom-up” hike doesn’t require any rappels or swims like the “top-down” route, but it is a strenuous back-country hike through beautiful cascades and stepped waterfalls to get to the classic lower Subway formation. Note: a wilderness permit is required for this hike and due to its epic popularity, a lottery system has been put in place. If you are lucky enough to get a permit, do this hike!
The Narrows
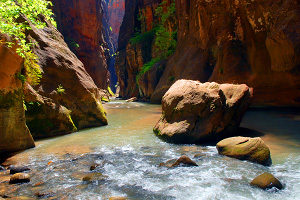
The North Fork of the Virgin River (aka “The Zion Narrows”) is probably one of the most legendary canyons to hike in all of Zion National Park. The Zion Narrows is the section of the Virgin River just upstream from the Temple of Sinawava (the end of the road up the main canyon). Here, the majestic walls of the main canyon close in to form a tall and narrow canyon with beautiful dark corners and the Virgin River flowing around you. With beautiful flowing water and barely any direct sunlight reaching the bottom, this is the slot canyon that all other slot canyons are compared to.
Three Ways to Hike the Zion Narrows:
 Zion Narrows “Bottom Up” Day Hike (from the Temple of Sinawava):
For tourists or casual hikers who want to see the best of the Zion Narrows, this is the hike that you want to do! Starting at the Temple of Sinawava (the last stop on the free Zion Canyon shuttle), you can hike up the Riverside Walk trail and then continue hiking right up the river to see some of the best “narrows” sections of the North Fork of the Virgin River. Hike up as far as you want to go and then turn around and retrace your steps. A side hike up Orderville Canyon is also a good detour to see even more amazing slot canyon scenery. As a round-trip hike, this can be as leisurely or strenuous as you wish to make it. A wilderness permit is NOT required for this hike.
 “Top Down” Two-Day Backpacking (from Chamberlain’s Ranch):
The “Top Down” Zion Narrows hike is a strenuous 16-mile through hike that starts at Chamberlain’s Ranch, many miles northeast of Zion’s popular main canyon. (You must drive to or hire a private outfitter to shuttle you to the remote trailhead.) This route takes you through the more subtle scenery of the upper plateau as you follow the North Fork as it slowly transforms from an open stream into the majestic and deep slot canyon that opens into Zion Canyon. A wilderness permit is required for this route and you choose one of the beautiful designated campsites when you purchase your permit at the Visitor Center. “Top Down” Strenuous Day Hike (from Chamberlain’s Ranch):
If you are a fast and strong hiker, the “top down” Narrows hike can be completed in one day. This hike may take roughly 12-14 hours to complete, so be sure to start early and keep a good pace! Bring a headlamp just in case you have to hike the last stretch after dark. A wilderness permit is required for the top-down day hike.
Wilderness Permits:
You do not need a permit to do the Zion Narrows “bottom up” day hike from the Temple of Sinawava. You DO, however, need a Zion permit for all “top-down” hikes, even if you are not backpacking. If you are doing the backpacking option, you pick your campsite when you reserve or purchase the permit for your group.
Two caveats: 1) The National Park Service will not issue any Narrows permits if water levels are too high, either because of flash floods or high flow during the spring runoff. 2) During the winter months, permits for the one-day top-down hike are also not issued as there is not enough daylight to complete the hike safely. Please see the Zion Wilderness Permits website for more information.


